Introduction
Blender is a powerful 3D modeling and animation software that offers a wide range of features for artists and designers. One of these features is the Material Override function, which allows you to temporarily replace all the materials in a scene with a single material. This can be incredibly useful for various purposes, such as previewing the lighting, testing the scene with a different material, or simplifying the look for rendering purposes. In this blog post, we’ll walk you through the steps to use Material Override in Blender effectively.
What is Material Override?
Material Override is a feature in Blender that lets you apply a single material to all objects in a scene, overriding their original materials. This is particularly helpful when you want to:
- Test lighting and shadows without the distraction of textures and complex materials.
- Create a clay render or a single-color preview.
- Simplify materials for faster rendering during the testing phase.
Setting Up Material Override
To use Material Override in Blender, follow these steps:
Step 1: Open Your Scene
Start by opening your Blender project. Ensure that your scene is set up with all the objects and materials you want to work with.
Step 2: Create a New Material
You need to create the material that you want to use for the override. Here’s how:
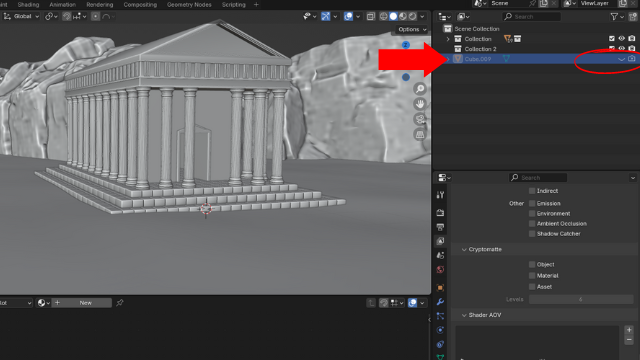
- On the viewport workspace, press Shift+A and add a cube to your scene.
- Go to the Shading workspace.
- With the cube selected, click on the New button in the Material properties panel to create a new material.
- Customize this material as needed. For example, you might want to create a simple diffuse material with a neutral color.
- Rename the material to make it easier to find it later.
- Disable the rendering of the cube and hide it, if you wish.
Step 3: Apply the Material Override
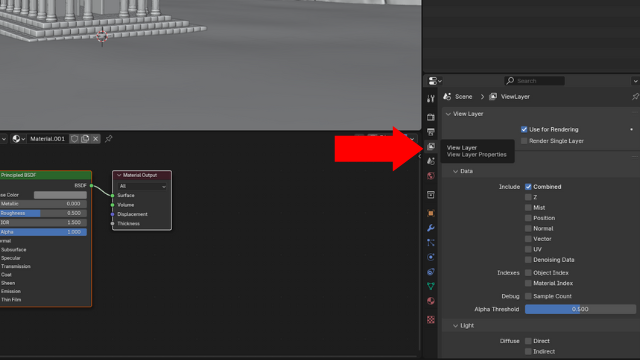
To apply the Material Override, you’ll need to work with the Render Layers panel:
- Switch to the View Layer Properties tab (represented by a stack of layers icon) in the Properties panel.
- Scroll down to find the Override section.
- Click on the material slot to open the material selection menu.
- Choose the material you created in Step 2 from the list.
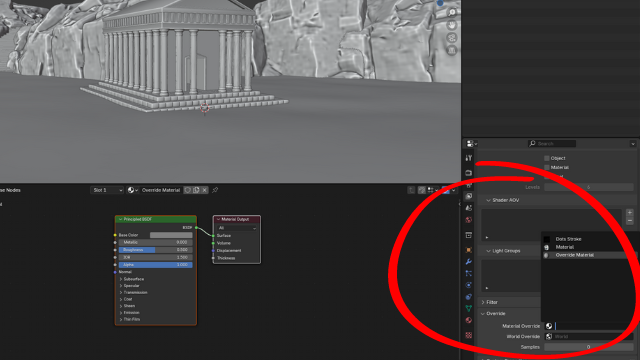
Once you select the material, Blender will apply it to all objects in the scene for this view layer.
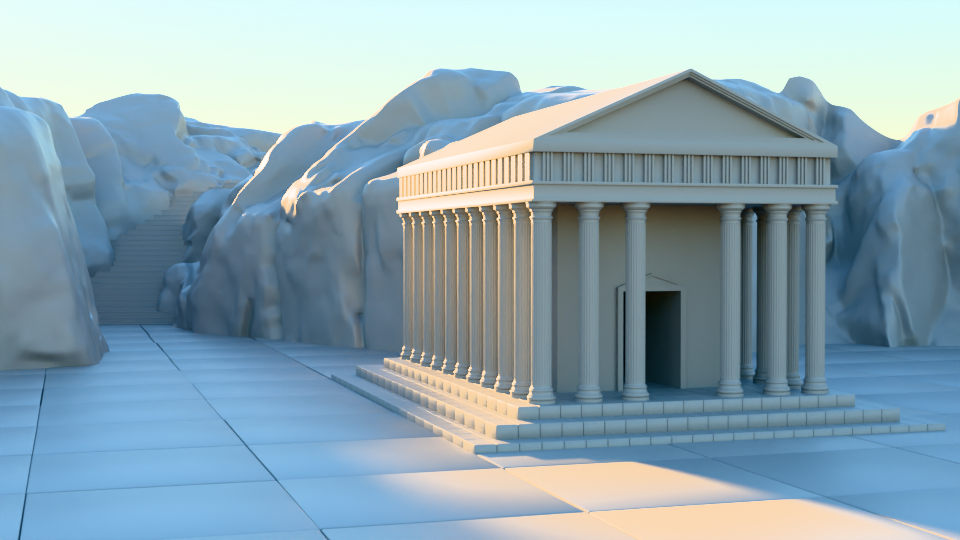
Step 5: Render Your Scene
Now you can render your scene to see the effect of the Material Override. Go to the Render menu and select Render Image or press F12. Your render will now use the override material you specified.
Conclusion
Material Override is a handy feature in Blender that can save you time and effort when testing and previewing your scenes. By temporarily replacing all materials with a single material, you can focus on aspects like lighting and composition without the distraction of detailed textures and shaders. Whether you’re creating clay renders or just simplifying your scene for faster renders, Material Override is a tool worth trying.