Introduction
Exporting your animation as MP4 in Blender is one of those things that looks simple until you actually try it. Blender is packed with options and it’s not always clear where things are, but once you find the right settings, exporting as MP4 takes about a minute to set up.
In this tutorial I’ll show you exactly where to go, which settings to change, and why rendering to PNG first is almost always the smarter move.
Blender Version: 5.1
1. Set Up the Output Properties
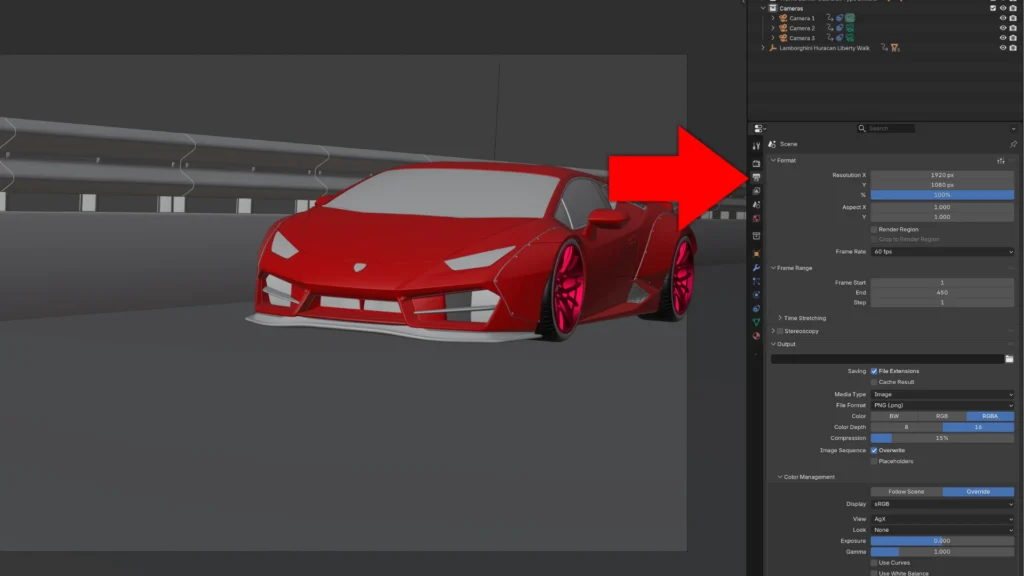
Open the Output Properties tab — it’s the printer icon in the Properties panel on the right side of the screen.
🎬 Media Type
In the Output section, change Media Type from Image to Video.
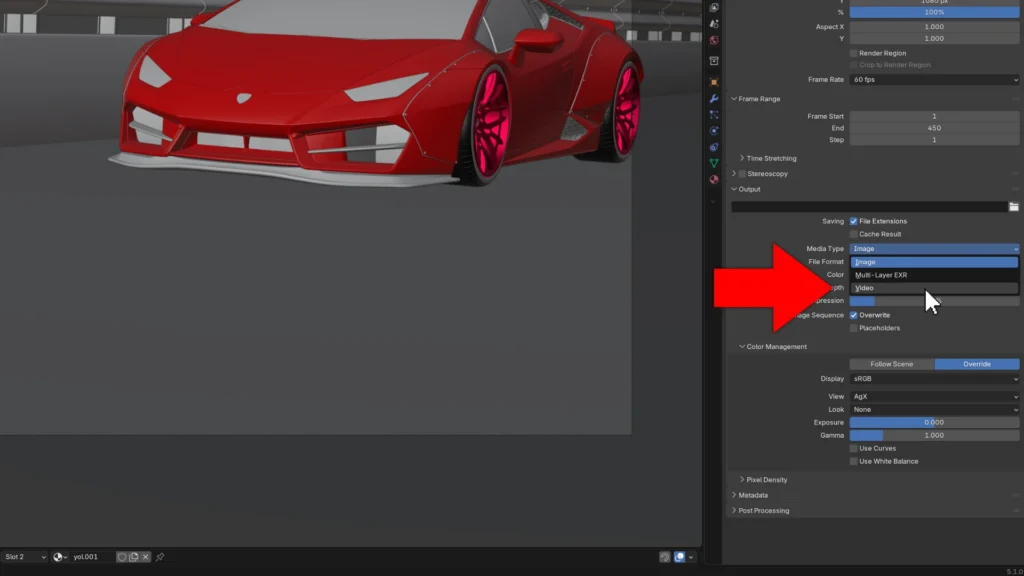
The Encoding section will appear automatically below.
📦 Container and Codec
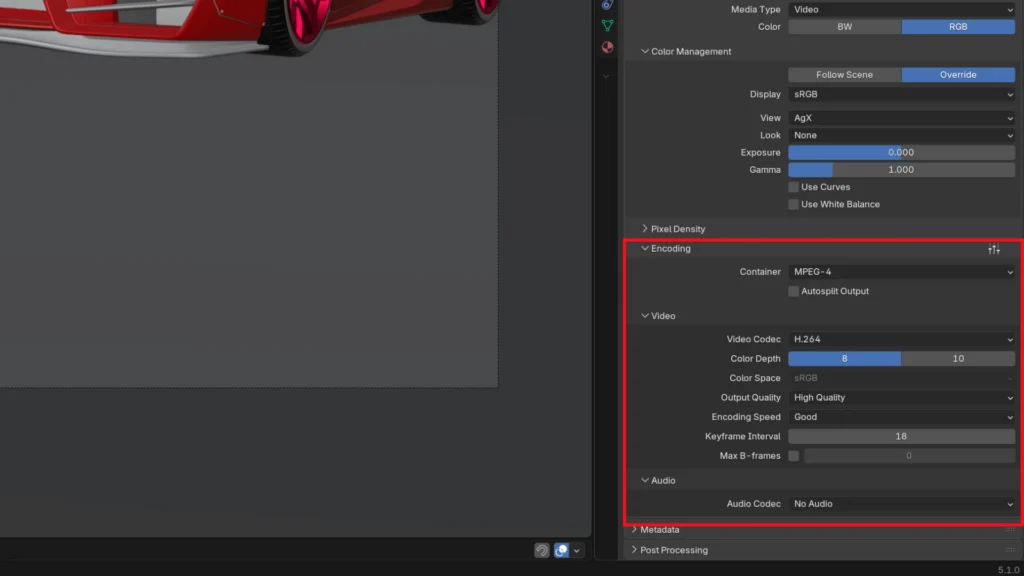
Under Encoding:
- Set Container to MPEG-4
- Video Codec is already H.264
- Set Output Quality to Perceptually Lossless or High Quality
📁 Output Path
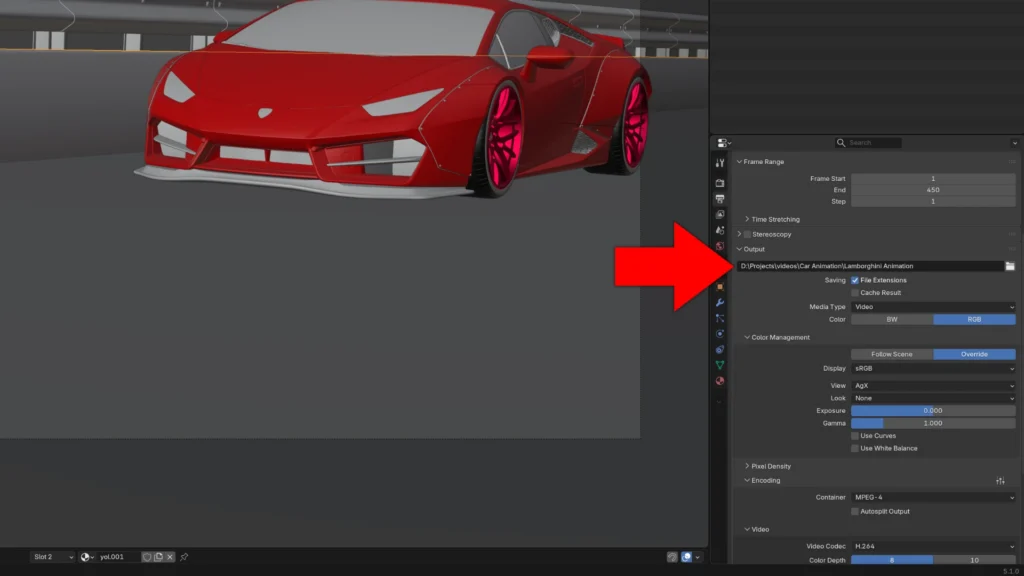
At the top of the Output section, set the folder where the file will be saved.
You can also type a filename at the end of the path — otherwise Blender will name it automatically based on the frame range.
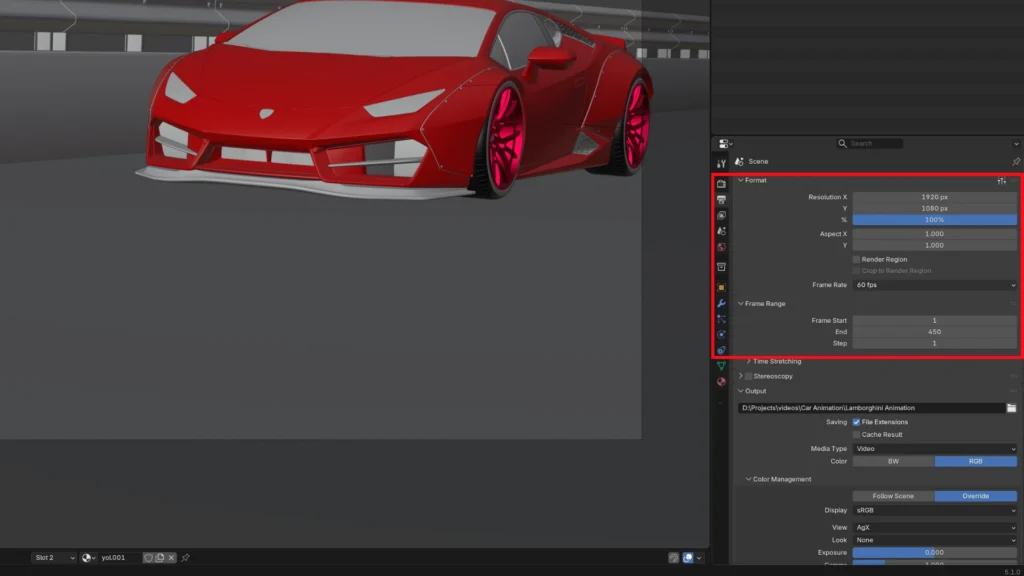
🖼 Resolution and Frame Range
Still in Output Properties:
- Set your Resolution under the Format section — 1920 × 1080 is standard for most uses
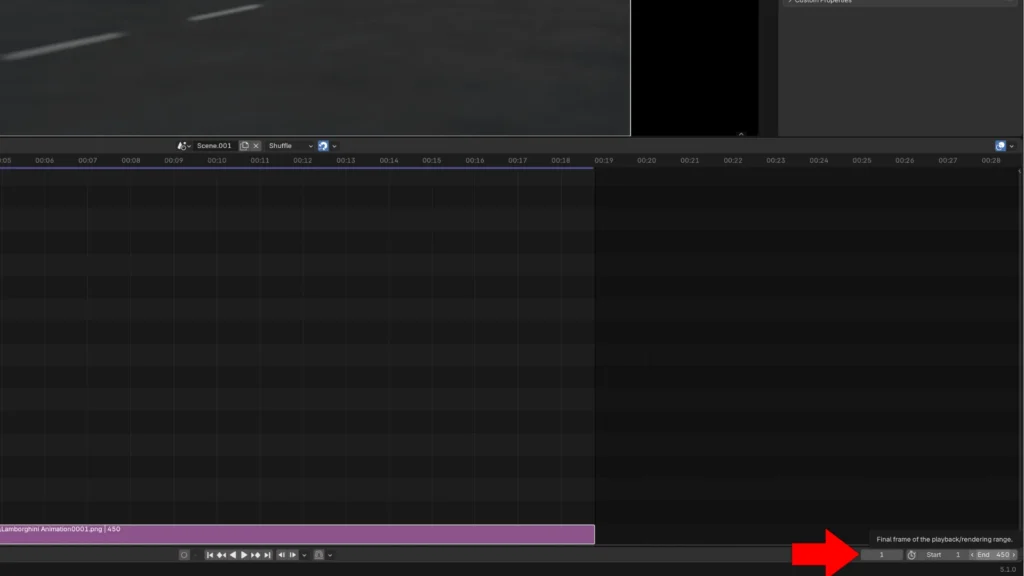
- Make sure your Start Frame and End Frame match your animation
✅ Everything is set. Time to render.
2. Render the Animation
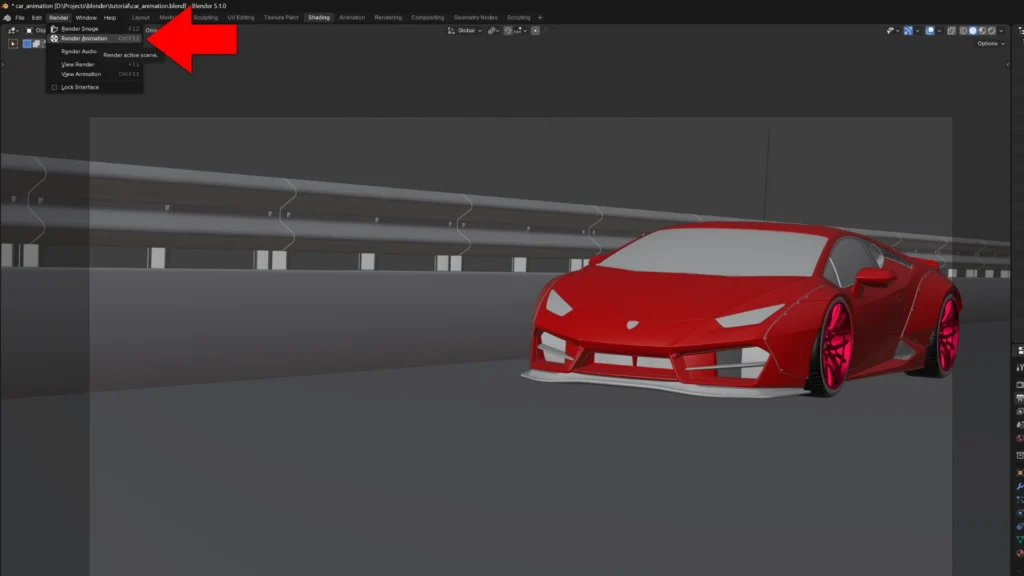
Go to Render > Render Animation in the top menu, or press Ctrl + F12.
Blender will render each frame and encode the MP4 at the same time. When it finishes, your file will be waiting in the output folder you set.
3. The Safer Workflow: Render PNG First
Here’s something most tutorials don’t mention.
If Blender crashes mid-render — or your computer restarts, or the power goes out — your MP4 file is gone. The video is being written frame by frame, so a crash corrupts the whole file.
The safer approach is to render your animation as a PNG image sequence first, then convert it to MP4 using Blender’s Video Sequence Editor.
🖼 Step 1 — Render as PNG
- Set File Format back to PNG
- Set the output to a dedicated folder
- Press Ctrl + F12 to render
If anything goes wrong, you only re-render the missing frames by adjusting the Frame Range. You don’t need to render the whole thing from scratch.
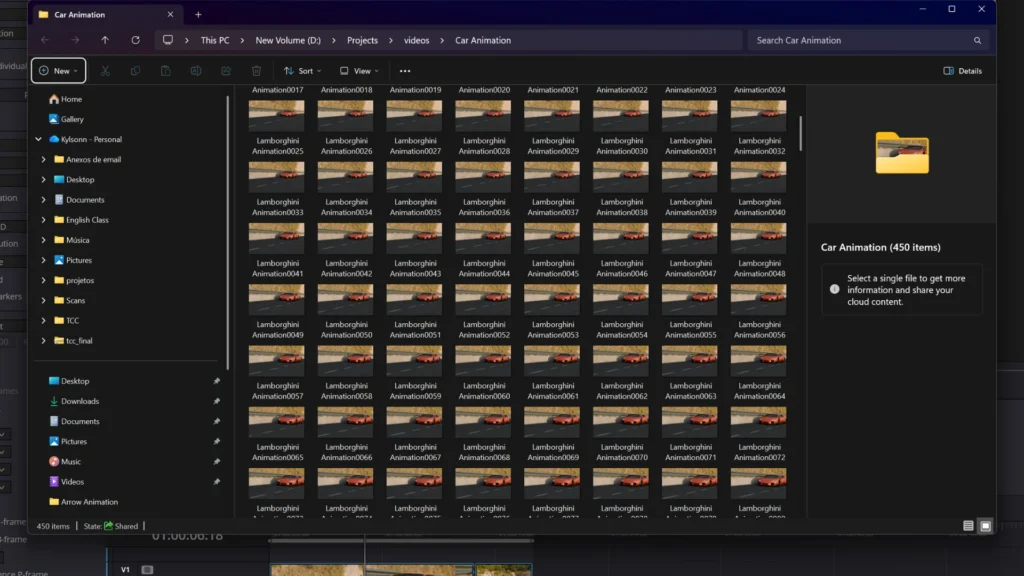
🎞 Step 2 — Convert to MP4 in the VSE
- Open a new Blender file (you can also use other video editing software, but in this tutorial we’ll stick to Blender)
- Switch to the Video Editing workspace (top menu — you might have to click on the plus button to find the Video Editing workspace )
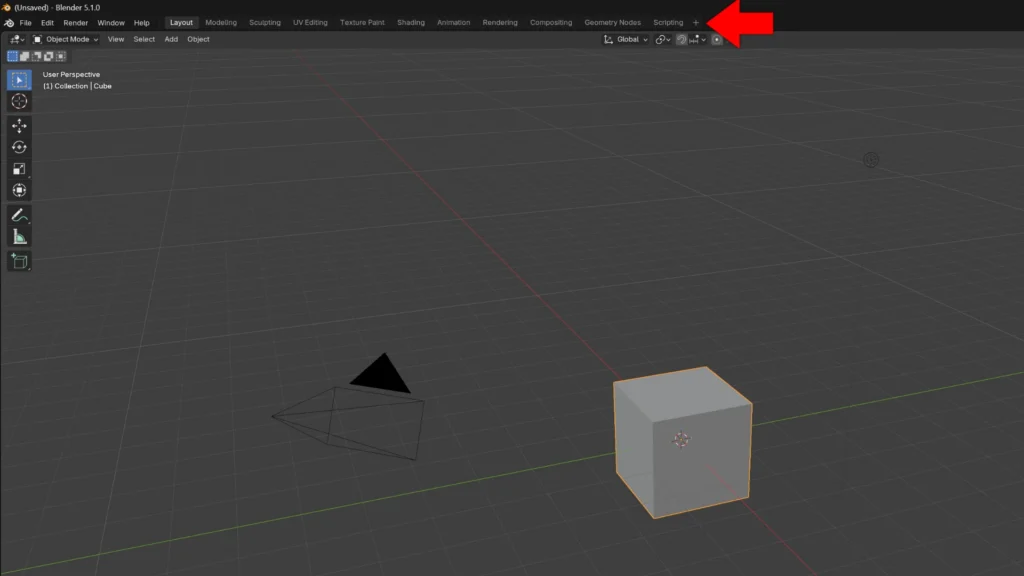
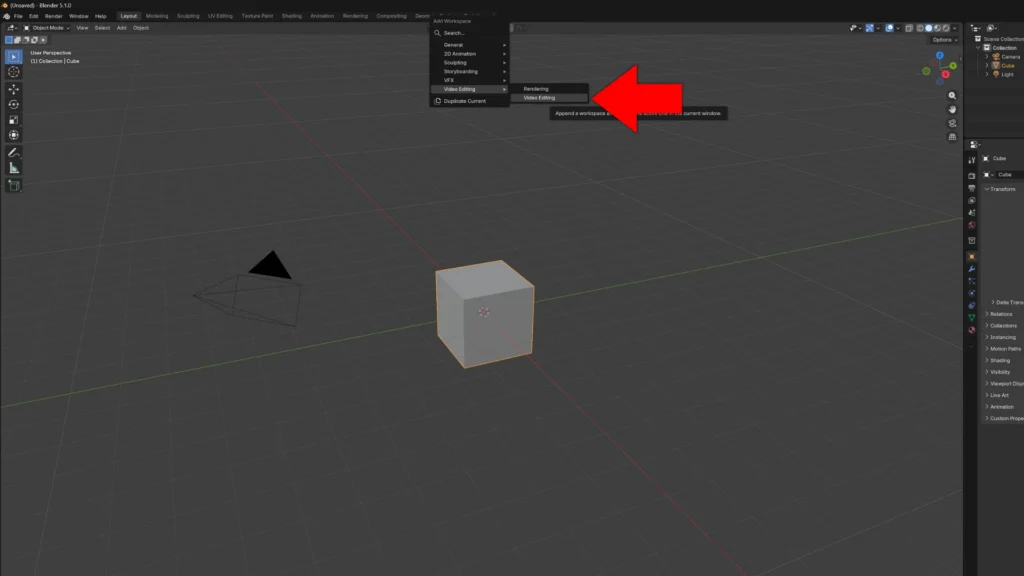
- In the Video Sequencer panel add a new scene
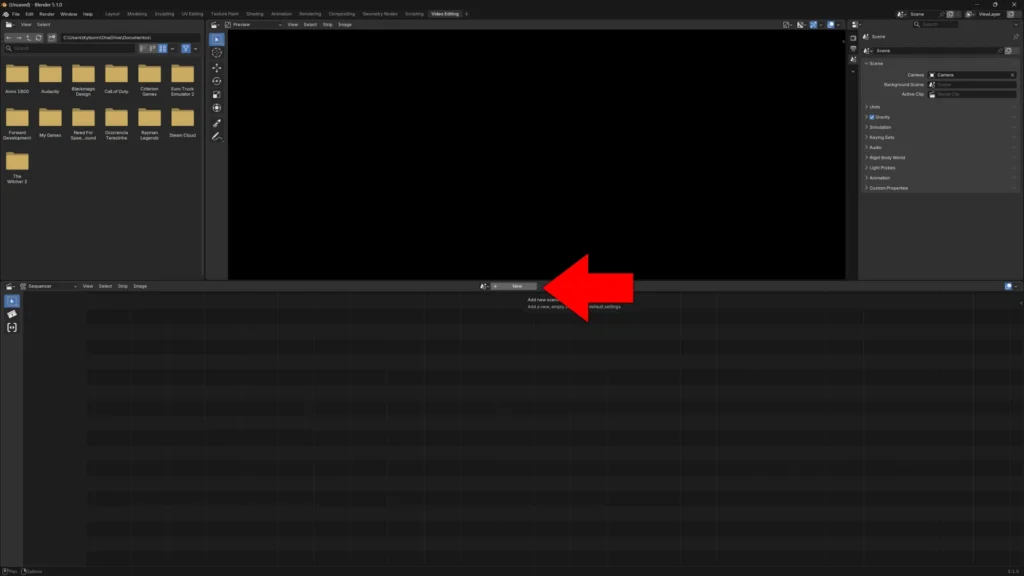
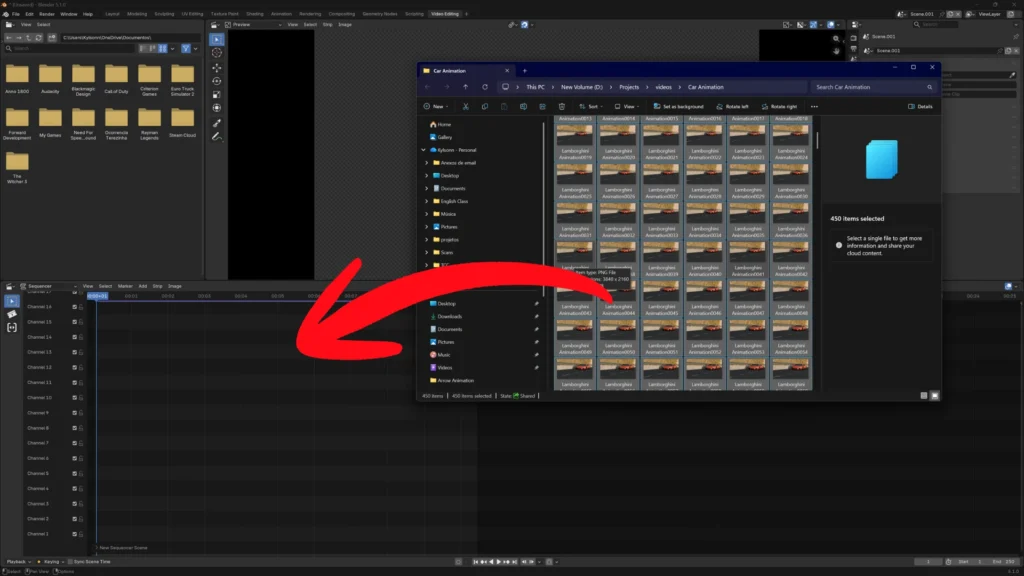
- Navigate to your PNG folder and drag all images into your scene
- Adjust the frame range
- Set the output to Video / MPEG-4 / H.264 / High Quality (same settings as before)
- Set the folder where the file will be saved.
- Press Ctrl + F12
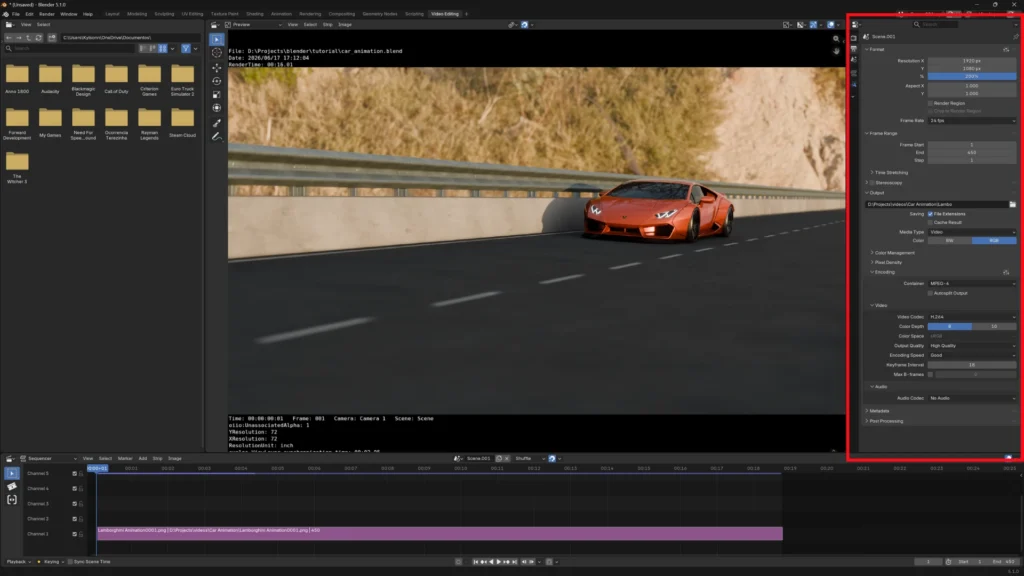
✅ Blender stitches all the frames into a clean MP4 — no rendering required, just encoding.
Common Issues
“The MP4 won’t play or upload to YouTube”
Make sure you’re using H.264 as the codec and MPEG-4 as the container. Other combinations may not be supported everywhere.
“The file size is huge”
Lower the Output Quality setting, or manually reduce the bitrate in the encoding options.
💬 Final Thoughts
The settings themselves are simple once you know where to look: set Media Type to Video, Container to MPEG-4, and Codec to H.264. The bigger takeaway is the PNG workflow — it’s a small habit that will save you from a painful re-render one day.
Lower the Output Quality setting, or manually reduce the bitrate in the encoding options.