Introduction
Rotating an HDRI is one of the most common adjustments you’ll make once you start using them for lighting — the environment might look great, but the brightest part of the sky isn’t hitting your subject from the right angle. Blender gives you two ways to fix that.
In this tutorial I’ll show you both methods: a quick built-in option for one-off adjustments, and a node-based setup that’s better if you want to animate the rotation.
Blender Version: 5.1
1. Rotate Using the Node’s Built-In Texture Mapping
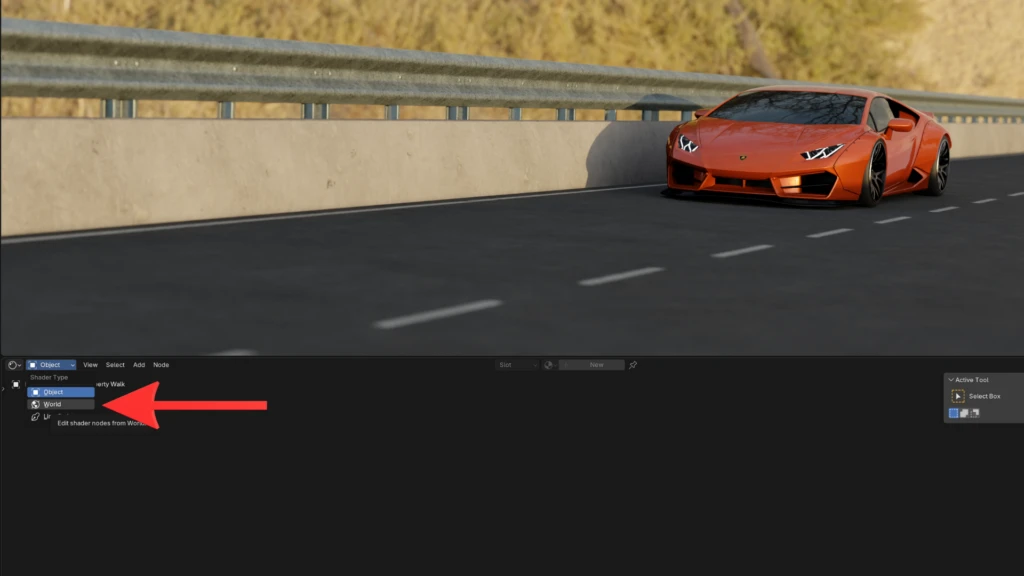
Open the Shader Editor and switch the editor type from Object to World using the dropdown in the top-left corner.
Select the Environment Texture node, then press N to open the sidebar.
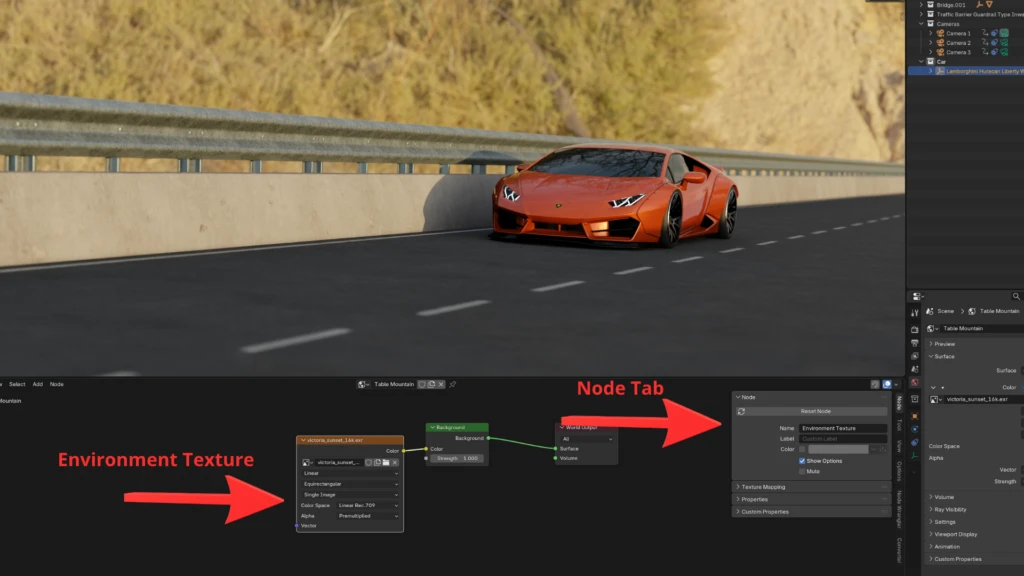
In the sidebar, open the Node tab and expand the Texture Mapping section.
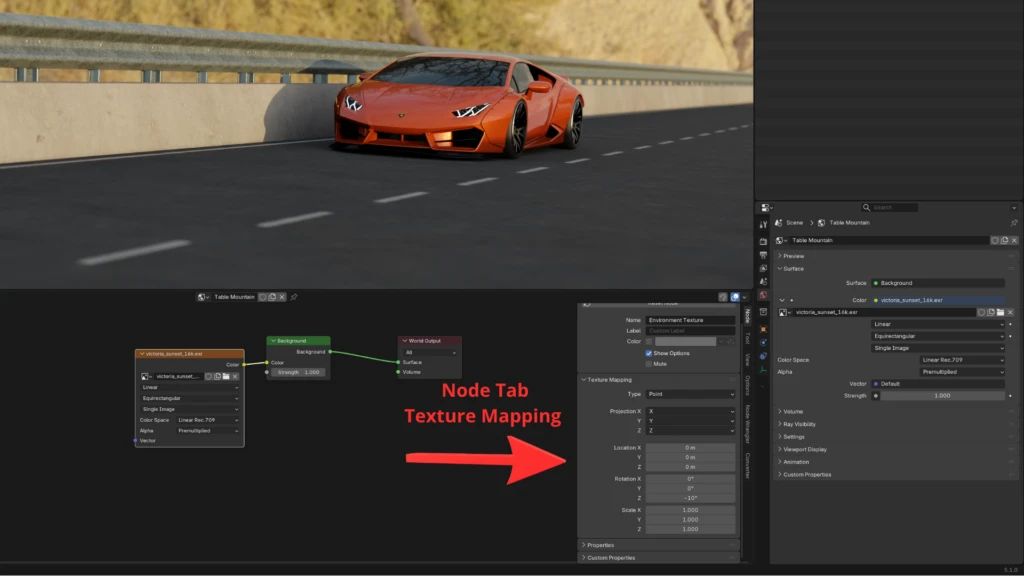
Change the Rotation Z value to rotate the HDRI around its vertical axis.
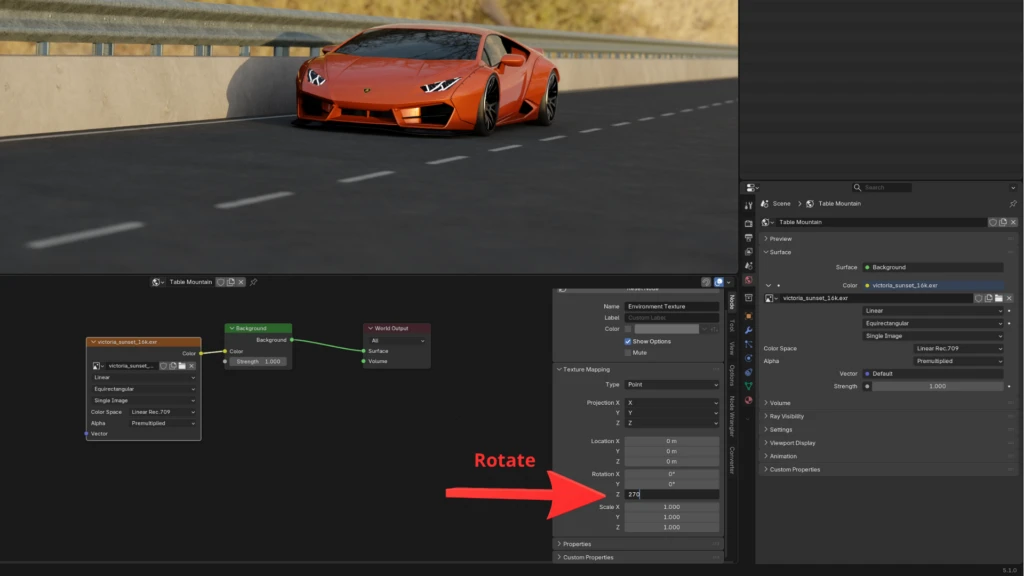
2. Rotate Using a Texture Coordinate + Mapping Node
If you want to animate the rotation, add a Texture Coordinate node (Add > Input > Texture Coordinate) and a Mapping node (Add > Vector > Utilities > Mapping) (or select the environment texture, then press ctrl+t, if you have the Node Wrangler add-on enabled)
Connect the Texture Coordinate node’s Generated output to the Mapping node’s Vector input, then connect the Mapping node’s Vector output to the Environment Texture node’s Vector input.
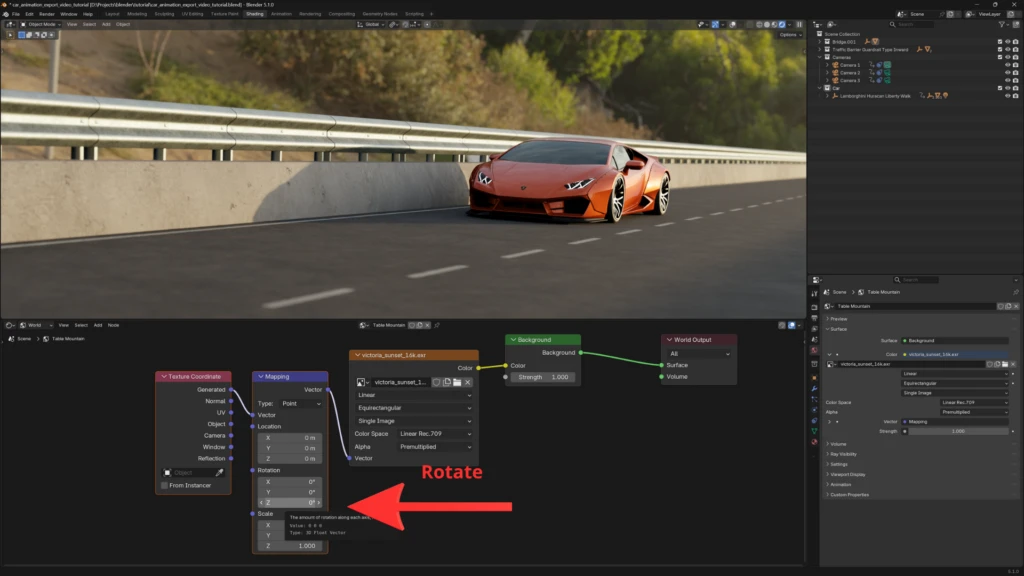
Change the Rotation Z value on the Mapping node to rotate the HDRI. Because it’s now a separate node, you can keyframe it to animate the rotation, or plug the same Mapping node into more than one Environment Texture node.
Common Issues
“I can’t find Texture Mapping in the sidebar”
Make sure the Environment Texture is selected.
“Which method should I use?”
Use the built-in Texture Mapping panel for a quick, one-off adjustment. Use the Texture Coordinate + Mapping node setup if you want to animate the rotation or drive it with a value used elsewhere in your scene.
💬 Final Thoughts
Both methods rotate the exact same thing — the HDRI’s mapping around the Z axis — so pick whichever fits the situation. For a quick tweak while lining up lighting, the built-in Texture Mapping panel is the fastest path. If you’re setting up something you’ll want to animate or reuse, the Texture Coordinate + Mapping node combo is worth the extra two nodes.